You are NOT the hired photographer!… Part 1

Today we’re going to talk about manners and when I say “we” I mean me. You … are going to listen.

So, you’ve got a DSLR and a couple of lenses and a memory card or two. You’re armed with a version of Photoshop Elements or maybe you’ve discovered that god-awful online free editing program that I will not honor with a mention.

You are anxious to make a name for yourself and gain the reputation of being a good photographer.

You take your camera everywhere. And when I say “everywhere” that includes weddings. As in … you received an invitation to be a guest.

Oh, you are SO excited! What an opportunity! You can take your camera and lenses and take some wedding photos while you are there. Oh, what a brilliant thought – you can put the photos on a disk and give them to the bride and groom as a wedding gift!

You prepare carefully for the wedding. You look at the websites of some well-known wedding photographers and see some nice photos. Perhaps you can steal the bride and groom for a few minutes and get some photos just like these!

The wedding day arrives and you go to the church a little early to see the bride. The professional photographer is there and you observe him taking some photos. He leaves for a bit and you try to do some of the same photos he did. It looked pretty easy and you like what you see on the back of your camera and show the bride. She is really excited about them.

It’s time for the ceremony and you get seated early so you can be as close to the front as possible. You take a seat right on the aisle so you have a great viewpoint. When the bridesmaids come down the aisle, you lean out into the aisle to take their pictures. Then you do the same for the bride and her father. You see the professional photographer shooting your way, and you think maybe he got you in his shots, but he should have known better and stood somewhere else. You can’t believe your friend hired this guy. So far he’s just done easy stuff that you have been able to duplicate, no problem.

After the ceremony, it’s time for the formals. You’re not in the family or the bridal party, but you stick around to watch and maybe get a few shots since you are going to give the bride and groom such an awesome gift. The professional is doing a pretty good job of arranging the groups of people (thank goodness he seems good at SOMEthing), so you stand a little behind him and take a few shots while he is shooting too. You check a few on the back of the camera and are really pleased how they look. More excitement!

A couple times you are able to get really close to the photographer so that when the people in the photos are looking at him, it looks like they are looking at you too. But sometimes that doesn’t work and you wave your hand really quick and say “look over here, please” and then you get a REALLY good shot. Wow, that worked great, so you do that for each of the rest of the formal shots.

A couple of other people with cameras start doing the same thing and you smile at them. They thought that was such a good idea that they are doing it, too. They don’t have a pro camera like yours, so your photos will be tons better, but that’s okay, they obviously see that you know what you are doing since they keep letting you go first.

While the photographer is packing up his gear, you hang out to chat and pick his brain a little. He doesn’t seem that friendly and now you REALLY don’t get why the bride hired him. Maybe he was really cheap. Honestly, you start to wonder if he even knows what he’s doing.

At the reception, you’re feeling really positive about how things are going, so you get right in there during the cake-cutting and the dancing and the toasting and the garter-tossing and bouquet-throwing.

By the time the reception is over you are bursting with excitement. You showed some pictures on the back of your camera to a lot of people at the reception and they all asked you for copies of them. This photography stuff is pretty cool.

When you get home, you put the photos on your computer and upload them to Facebook and tag the bride and groom and everyone you know. You have over 500 photos that you put online and you post a message that you will make copies for everyone.

By the next morning you have 16 requests in your inbox for a copy of the photos and there are lots of amazing comments on the photos. You are SO happy!

OK, hang tight while I step up on the soapbox.

If this is you, get as far away from me as you can, because I despise running into people like you when I shoot a wedding.

I am the hired photographer. You are not.

I just spent the last 8-10 hours trying to avoid getting you in my shots. You annoyed the heck out of me with your questions and you delayed the formals with all of your “look over here” pleases until I was 20 minutes behind in releasing the wedding party so they could get to the reception.

At the reception you acted like you worked for me and even WITH me. You jotted your email down for people and promised them copies of the photos.

Within hours you had 500 photos on Facebook so that they could be copied and downloaded and made further promises to put them on CDs for whoever wanted.

You just effectively undermined my authority during the wedding day and stripped me of any possibility of selling any prints.

You also just set a precedent for the price of digital files. I charge 4 figures for a disk of digital wedding files and you just gave them away for free.

So, forgive me if I don’t want to chat with you.

Forgive me for not wanting to let you pick my brain.

Forgive me for not wanting to give you any helping hints.

I’m too busy trying to pull the knife out of my back to be friendly to you.

(To be continued…)

Client Presentation – Another Look at Digital Files on Disk

Hi everyone, Christine here. Please welcome this evening’s guest blogger, Nicole Wandrie from Joyful Heart Photography in Crookston, Minnesota. Nicole is a Certified Professional Photographer and one of my virtual BFFs. She shared some photos with me of her digital file presentation and I asked her if I could feature them on Wootness!™ and she graciously agreed to write an article as well, since I was in a bit of a time pinch. So, let’s give Nicole a warm Wootness!™ welcome. (Thank you Nicole – IOU a Wootness!™ shirt!)

Continue reading “Client Presentation – Another Look at Digital Files on Disk”

DIY Digital File Presentation

Oh happy day! Today marks the 2 week birthday of Wootness!™

In that time, we’ve had 12,000 page views, over 2,000 unique visitors and this is our 50th article!

Whew! I’m tired!

I’ve had a couple of people ask about how to package digital files, so I’m going to share with you the way that I do it. I cobbled together this system from a couple of sources and then did all the design work myself.

We aren’t going to get into a debate about whether or not you should sell digital files. That’s a personal decision and we just aren’t going to “go there.”

I sell two types of digital file packages. One is for my actor and business headshots and generally are 5 digital files or less and the other is for wedding packages. The packaging I will go over in this article is for the 5 file or less packages. I will cover the wedding digital file packaging in a future article (those clients pay more and receive a custom packaging option).

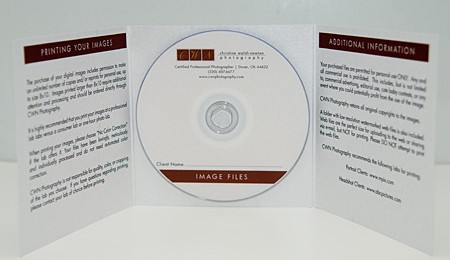
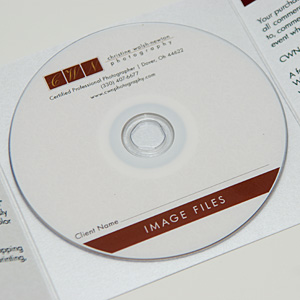
Here are some photos of my finished package. I have an Epson printer (model no longer being sold) that I use to print the design directly on the CD/DVD. Please see THIS ARTICLE about printing on CD/DVDs.

The outer packaging is a 5×5 trifold that I have printed at MPixPro.

I attach the CD/DVD to the trifold with a clear plastic hub that I purchased here: ULINE

There are areas on the print authorization form and the disc itself that need filled in with client information. I use a nice chisel-tipped calligraphy marker to hand write in these areas.

You can order envelopes with the trifolds (they are free). If I need to mail the package to a client, I put the trifold/envelope into a large padded envelope for safety. I don’t quite trust the package being handled by the USPS without a bit of extra protection.

 If you don’t want to deal with designing your own trifold and CD/DVD template I have put together my files for you, including all of the wording that I use for a nominal fee. You will need to delete my logo and insert your own and there are several areas that you will need to type in your info, as I currently have “placeholder text” there.

The trifold template is divided into two sections.

  • The inside contains:
    • Left Panel: This section is called “Printing Your Images” and discusses color correction, etc., maximum file size and disclaimers about using a non-professional lab. This text is in a jpg layer and contains my company name. You will need to delete the text file and insert your own, but you have permission to use the same exact wording if you wish.
    • Center Panel: This is blank and is where you will attach the CD/DVD hub and disc.
    • Right Panel: This section is called “Additional Information” and contains copyright information as well as suggestions on labs to have photos printed at.
  • The outside contains:
    • Left Panel: This section is called “Authorization” and contains a form that you will fill out with your information and the client’s information giving them permission to have the files printed at the lab of their choice. Sometimes this is referred to as a “Print Release.” The client will need to show this form to the personnel at the lab. This is an editable text layer.
    • Middle Panel” The panel is the back of the package and contains the logo and contact information. You will need to delete my logo and add your own. You will also need to replace the “placeholder text” with your own text.
    • Right Panel: This is the front of the package and contains my logo, which you will have to replace with your own as well as the title “DIGITAL IMAGES AND INFORMATION,”which is editable.

It is important to note that:

  • These files have been used with Adobe Photoshop CS3 and CS5. I can not guarantee that they will run with any other version or any version of Adobe Photoshop Elements.
  • You should know how to use Photoshop and especially, how to manipulate layers. I can answer questions if there are issues with the template that are my fault, but I will not answer questions on how to use Photoshop.
  • The background graphic for the files is of my own design and need not be replaced if you desire to use it.
  • The trifold file is designed to be printed through MPixPro. I cannot guarantee the suitability of if for any other lab and I have no intention on redesigning it. I do not desire to be in the template-designing business. 😉

The CD/DVD template is designed to match the trifold. You will need to replace my logo with your own and insert your information in place of the “placeholder” text. There is a circle shape layer that you can view for the purpose of assuring yourself that none of your design elements fall outside the printable area. Do not leave the circle shape layer on when printing.

The font used in this template set is Futura Book.

This file will be available for the next 24 hours for $2.50 as a special birthday offer. After that, it will be available in the Wootness!™ Deals section for $5. The $2.50 price expires at 6PM EST on Monday September 19, 2011. If you purchase the file, please do not share it. The proceeds will be used to run the site.

Add to Cart

NOTE: My apologies, there was a temporary issue with the “Buy It Now” button not reflecting the discount. I have updated the button and it is now working correctly. I will be refunding the overpayments shortly. Christine.


View Cart


Finding Balance and Setting Priorities

*Yawn* Good Morning! Yes, this article is running late. It was supposed to publish at 6AM, but I let it go because I was spending some quality time with my family until very late last night and just did not feel like writing an article at midnight. You weren’t going to be up at 6AM, anyway, and even if you are THE most devoted fan, I’m pretty sure you weren’t waiting by the computer for the latest article to pop up.

Continue reading “Finding Balance and Setting Priorities”

Gear Review: PhotoVision One-Shot Digital Calibration Target

It is an absolute MUST to use a gray-card or similar calibration target while shooting. I have a 24″ PhotoVision Calibration Target with me at all times. I use it for every single shoot I do. In fact, I wrote a blog article last summer for my clients, showing them the difference when using one and letting them know that they should ask their potential wedding photographer how they calibrate.

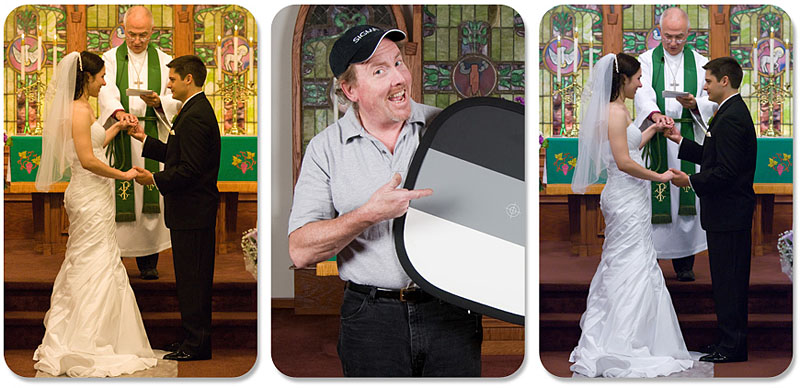
Here’s the photo sequence I used to illustrate the post:
The photo on the left shows the shot when using the “Auto” White Balance setting on the camera. The middle photo shows my big dude wedding assistant/second shooter with the calibration target (a la Vanna White) and the third photo shows the shot corrected for custom white balance after using the calibration target. See the difference?

I highly recommend you begin using a calibration target. There are many different ones out there, so look around and find something that looks as if it would be the proper style and size to work best for you.

Here are some link to the various sizes of the one I use. The one I bought (24″) folds down into a circle and comes with a zippered pouch to store it in, but I just stick it down in a pocket of my camera bag without the pouch and it stays collapsed just fine. The PhotoVision target is easy and convenient to use and even comes with an instructional DVD for guidance. I give it 5 Wootness points! 🙂

I talk a lot. Bet you didn’t know that.

Surprise!

Just a little note to let you all know that I have been writing my little pinkies off so there will be lots of material here for you to get started on. Don’t feel like you have to read through it all at once. It’s going to be here awhile.

After I get a good solid base of articles built up, I will drop back to writing once daily or several times weekly.

For now, since I’m writing 3-5 times a day – I highly recommend you sign up for the email updates. Every morning you will get the previous 24 hours worth of posts in one email that you can read at your leisure and you don’t have to worry about checking in at the website or facebook page.

HERE is a link to sign up for the daily email.

FYI – If you LIKE checking in – the posts are scheduled to be published daily at 6AM, 12 Noon and 6 PM, but sometimes I will throw an extra article or two if I’m really excited about something and just can’t wait to put it on the schedule.

Thanks all for coming along for the ride – the site has been a pure joy to write and I’m loving all of your comments. Wootness! 🙂